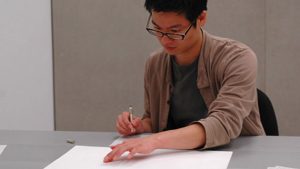
In the field of product design, being able to show your ideas through effective visual methods like sketching makes it easier for designers and clients to talk to each other. Sketching is a good way for designers to speed up the process of developing ideas in the real world.
Sometimes a sketch can say more than words, and you can understand what it means right away. Sketches are useful for designers who work in groups and sketches can deliver easy and fast way to brief an idea to others.
This article will explain the most important rules for sketching products that can help designers who are just starting out. With these few main steps, you’ll see that it’s not that hard to sketch products well.
You have to love it
It takes a lot of practise and time to become proficient at anything, and drawing sketches for products is no exception. Before you start drawing, it’s crucial that you figure out if you’re genuinely interested in the topic.

Whenever you hold a pen or pencil in your hand, you should immediately experience a surge of pleasure and enthusiasm. Sometimes, only your passion for sketching can help you get through the day.
Material and Equipment
Materials for sketching products are very important to product designers. Using the right tools will allow you to convey your thoughts clearly and help customers build a mental image of your goods.
If you want to make beautiful drawings, there’s no need to go out of your way and spend lots of money on supplies. Professional designers may create stunning works of art using nothing more than a single grey marker. One piece of basic gear is three grey markers placed 20% apart from one another.
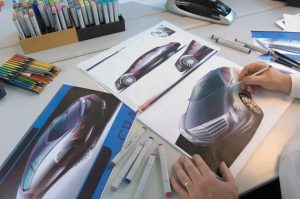
Examples include 30% and 50% delineators. Only the basic set of yellow, blue, and red markers is required. Use secondary hues like green and orange if money is no object. Don’t forget to round up some black marker ink, however.
Copic Markers, Prismacolor Markers, and Letraset Markers are the Most Often Used Markers for Quick Product Sketches. For the contours, you should also have some black fine liners and ballpoint pens on hand. You should try out different pens until you discover one that works well for you.
Get a sketchbook
Observe your surroundings and draw what you feel and observe. Pens are preferable since mistakes made with them cannot be erased without starting over on a fresh page. You should remember that your sketches should not be changed after they are completed.
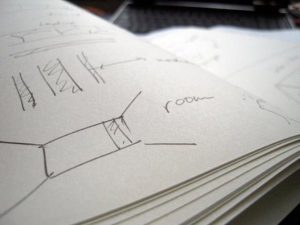
You may always start over by turning the page and drawing some more. Eventually, you’ll find that you’re sketching more intuitively and freely. Check out “Sketchbooks: The Secret Art of Designers, Illustrators, and Creatives” by Richard Brereton. A sketchbook need not be mundane, as you will soon discover.
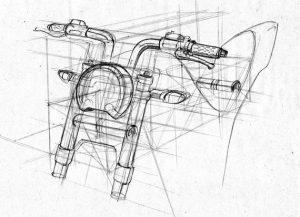
Perspective – What is that?
Understanding perspective and how to use it is crucial for drawing accurate depictions. A well-executed perspective drawing will make the subject seem “natural,” or as it would appear to the naked eye.
By definition, perspective is the process through which a three-dimensional object is rendered and communicated on a flat surface. One point perspective, two point perspective, and three point perspective are the most common forms of perspective drawings. As it results in easily understandable product conceptions, two-point perspective is often employed in product sketching.
Click here to learn more about perspective and how to create it in your writing.
A Right Position Of a Pencil
The key to being able to draw long, straight lines is in the way you grip your pencil or pen. Learning to draw a straight line without a ruler is often the first ability that novices are tasked with acquiring.
If you try to draw using your wrist, you’ll end up with squiggly, short lines on paper. But, if you use your elbow, you can make smooth, lengthy strokes.
Start with a simple geometry
Do not assume that you will be able to sit down and produce a work of art without any practise. You can begin by sketching basic forms like squares, triangles, rectangles, and ovals. Why, you may wonder, would anyone bother to spend effort on basic shapes when the vast majority of product designs are complex?
Everything has a geometric basis; this is the solution. A mini iPod, for instance, consists of two circles and two rectangles.
Sketch types
- Process drawings – The major objective is about comprehending an assignment. There are more writing that drawing. In this article, we will be assessing the competition and discussing the issues that have arisen.
- Ideation drawings – Sketches that are generated by designers when creating a concept of a product. Mostly sloppy and lacking in polish.
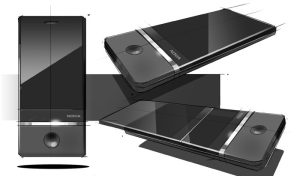
- Explanation drawings – Designed to illustrate function, form and structure of a design concept. These are sketches submitted to a customer. Readable to everyone.
- Persuasive drawings — Final sketches that are generally made in digital softwares such as CAD-programs, Adobe Photoshop and others. Detailed and colourful to impact audience and market a design concept.

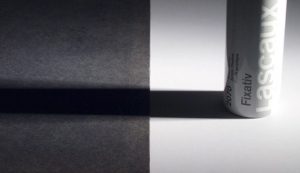
Shadows
As light is filtered or diffused, shadows form on nearby objects. The direction the light will be coming from must be decided upon before any shadows can be made. Sunlight shadows and cast shadows are the two most common types of shadows in art.
The size of a cast shadow should be large enough to highlight the object’s form without overwhelming the drawing. In addition, it gives the impression of depth to your sketches. Focus on efficiency and ease of use. If the thing is well-defined and attractive, you have succeeded.
Check out this page for in-depth explanations on shadow building technology.
Importance of details
Including specifics in drawings helps designers better communicate with clients. The size of an object can be inferred from its details. More realistic visuals can be made for whatever it is you’re making. When everything arrives undamaged, the focus shifts to the finer points.

Spend some time looking at commonplace things in a new light. Find out whether there are buttons and why there could be rubber or metal parts in certain locations.
Exaggerate the form
Users are meant to be able to see themselves using a product after seeing a design idea drawing. Meaning that in order to highlight the greatest qualities of the product, certain aspects are typically emphasised.

The elements themselves describe the product, which is why they need to be blown up. Even in cartoons, it’s common to see exaggerated features like noses, ears, and lips, because they help to define an individual’s personality.